Thanks to the oathtool(1), you can easily generate your OTPs using this
command-line utility and authenticate your 2FA-enabled accounts.
Step 0
Go to the SETTINGS and the Security tab, then click on ENABLE TWO-FACTOR AUTHENTICATION:
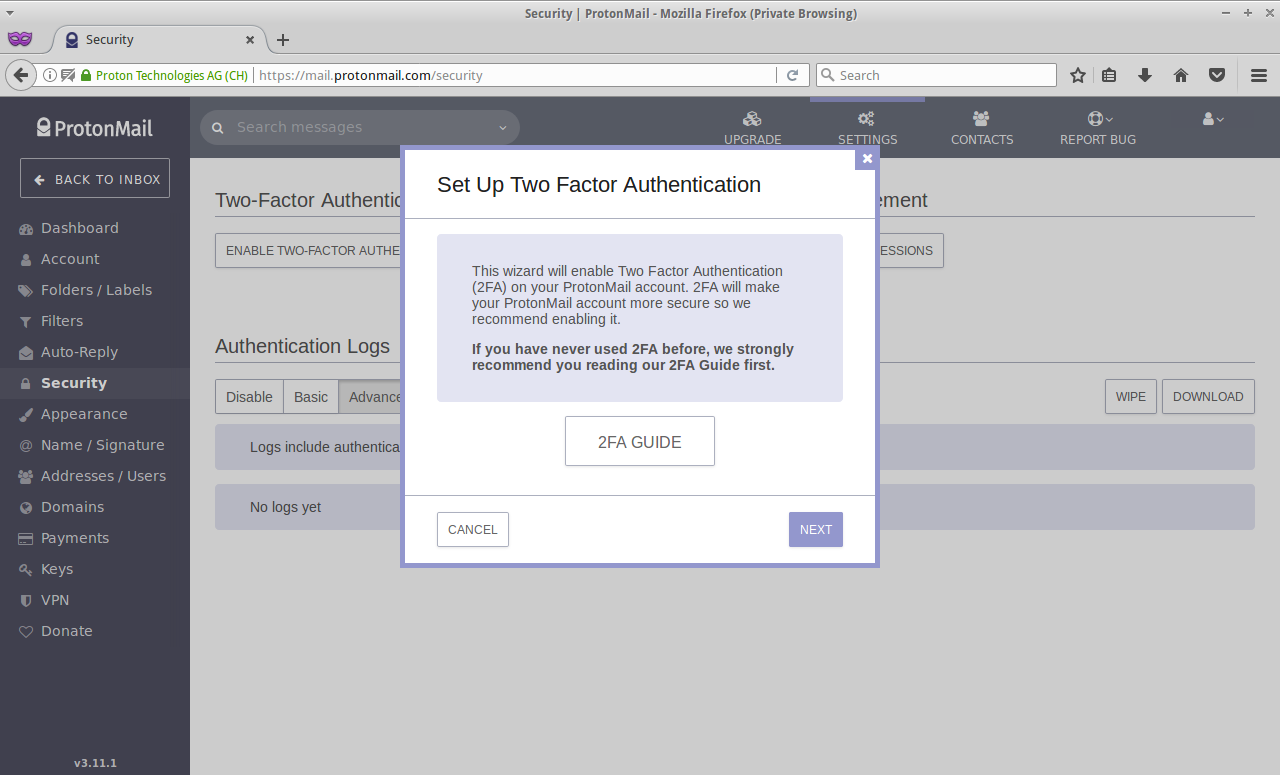
Step 1
Click on NEXT button and when you see the QR code, simply click on the Enter key manually instead:
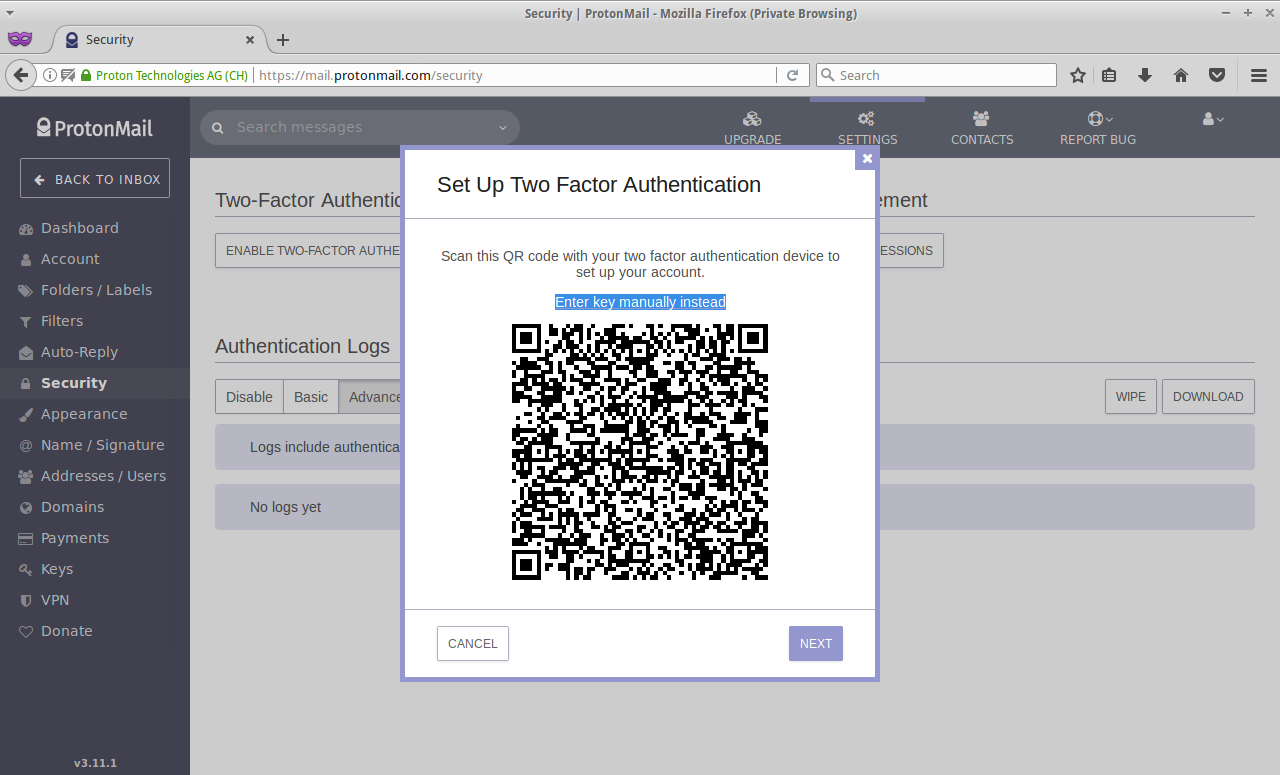
Step 2
Copy this key to somewhere safe and make sure you’re not gonna losing it whatsoever. (Tattoo is not a good idea btw.)
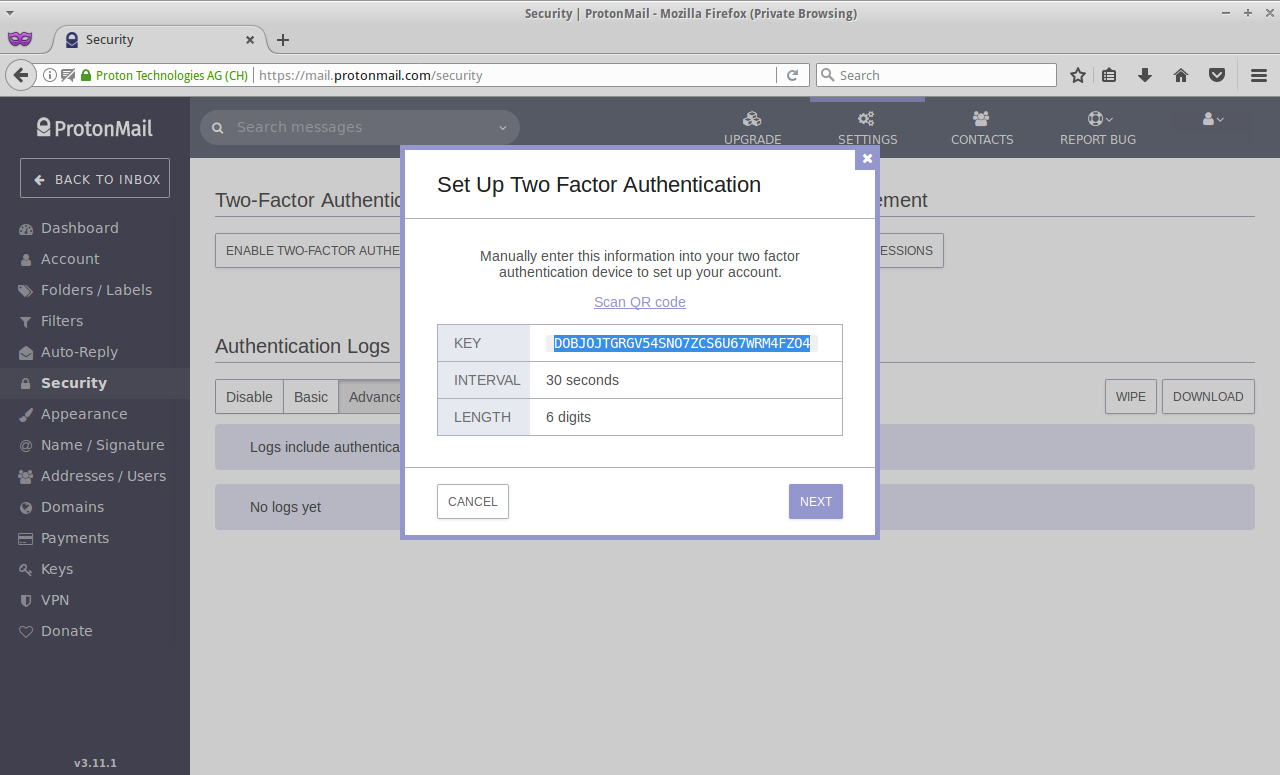
CAUTION: THIS KEY IS THE ONLY SOURCE FOR GENERATING OTPs AND IF YOU LOSE IT, SAY GOODBYE TO YOUR ACCOUNT. PERIOD. (That’s the whole point of OTP after all, isn’t it?)
Step 3
Now it’s time to actually generate the OTP and for doing so, we need to pass
our “shared key” to the oathtool(1) command-line utility but since most
shells are having a “feature” called history, you need to make sure that
you’re typing it in Bourne Shell or simply /bin/sh or if you prefer
your own beloved shell, make sure you use $ history -c and then removing
your .bash_history file or whatever “history” file it has. (You have been
warned!)
$ /bin/sh
$ oathtool --totp -b "DOBJOJTGRGV54SNO7ZCS6U67WRM4FZO4"
973487
Here we go:
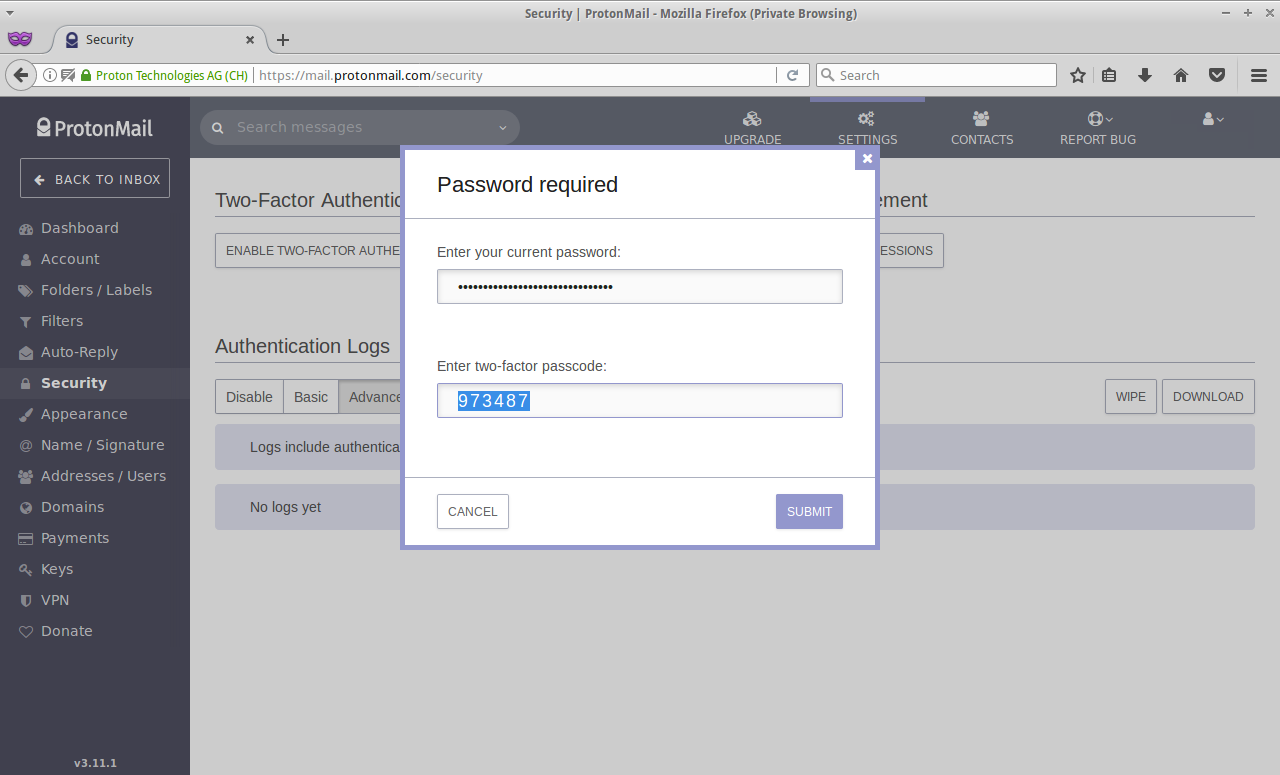
Step 4
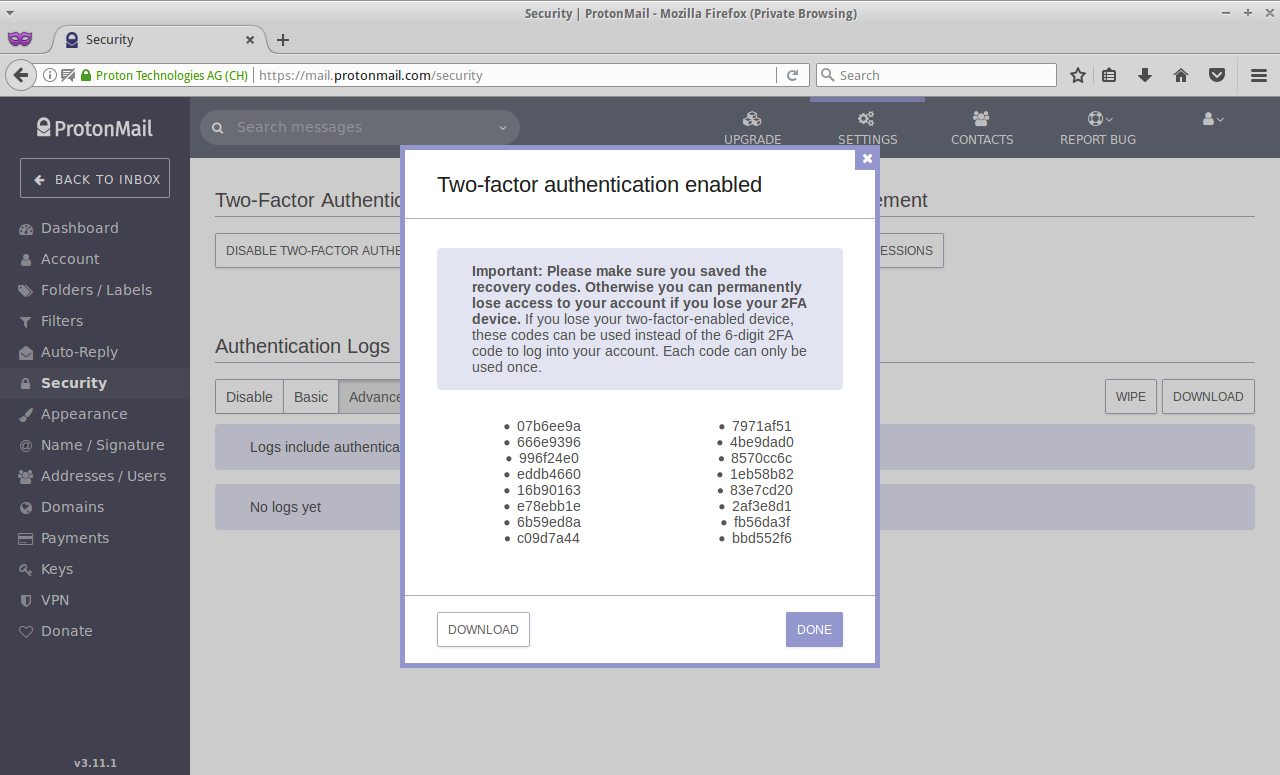
Backup this codes somewhere safe, and not just in 1 place:
Step 5
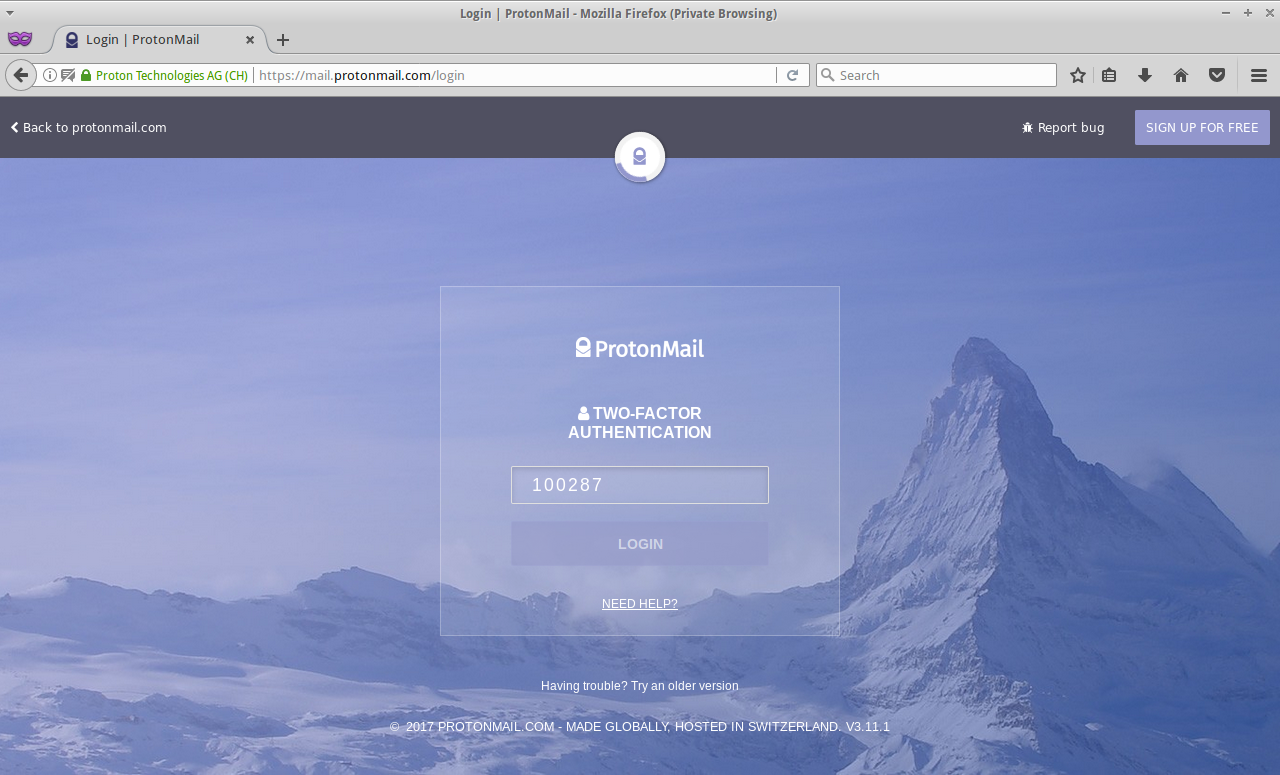
Now if you try to log-in to your ProtonMail, it will ask you for the 2FA OTP and again you can generate this code using the same command-line utility and the same shared-key:
$ /bin/sh
$ oathtool --totp -b "DOBJOJTGRGV54SNO7ZCS6U67WRM4FZO4"
100287
WARNING: NEVER EVER SHARE YOUR CODES WITH ANYONE ELSE AND NO ONE FROM PROTONMAIL(OR ANY OTHER SERVICE) SHOULD EVER ASK YOU FOR THIS CODE. IT APPLIES TO BOTH SHARED-KEY(THE SOURCE OF 6-DIGIT CODES) AND ALL THE 6-DIGIT OTPS THAT YOU’VE BACKED-UP OR GENERATING EACH TIME.